Lessons
Production Report Files
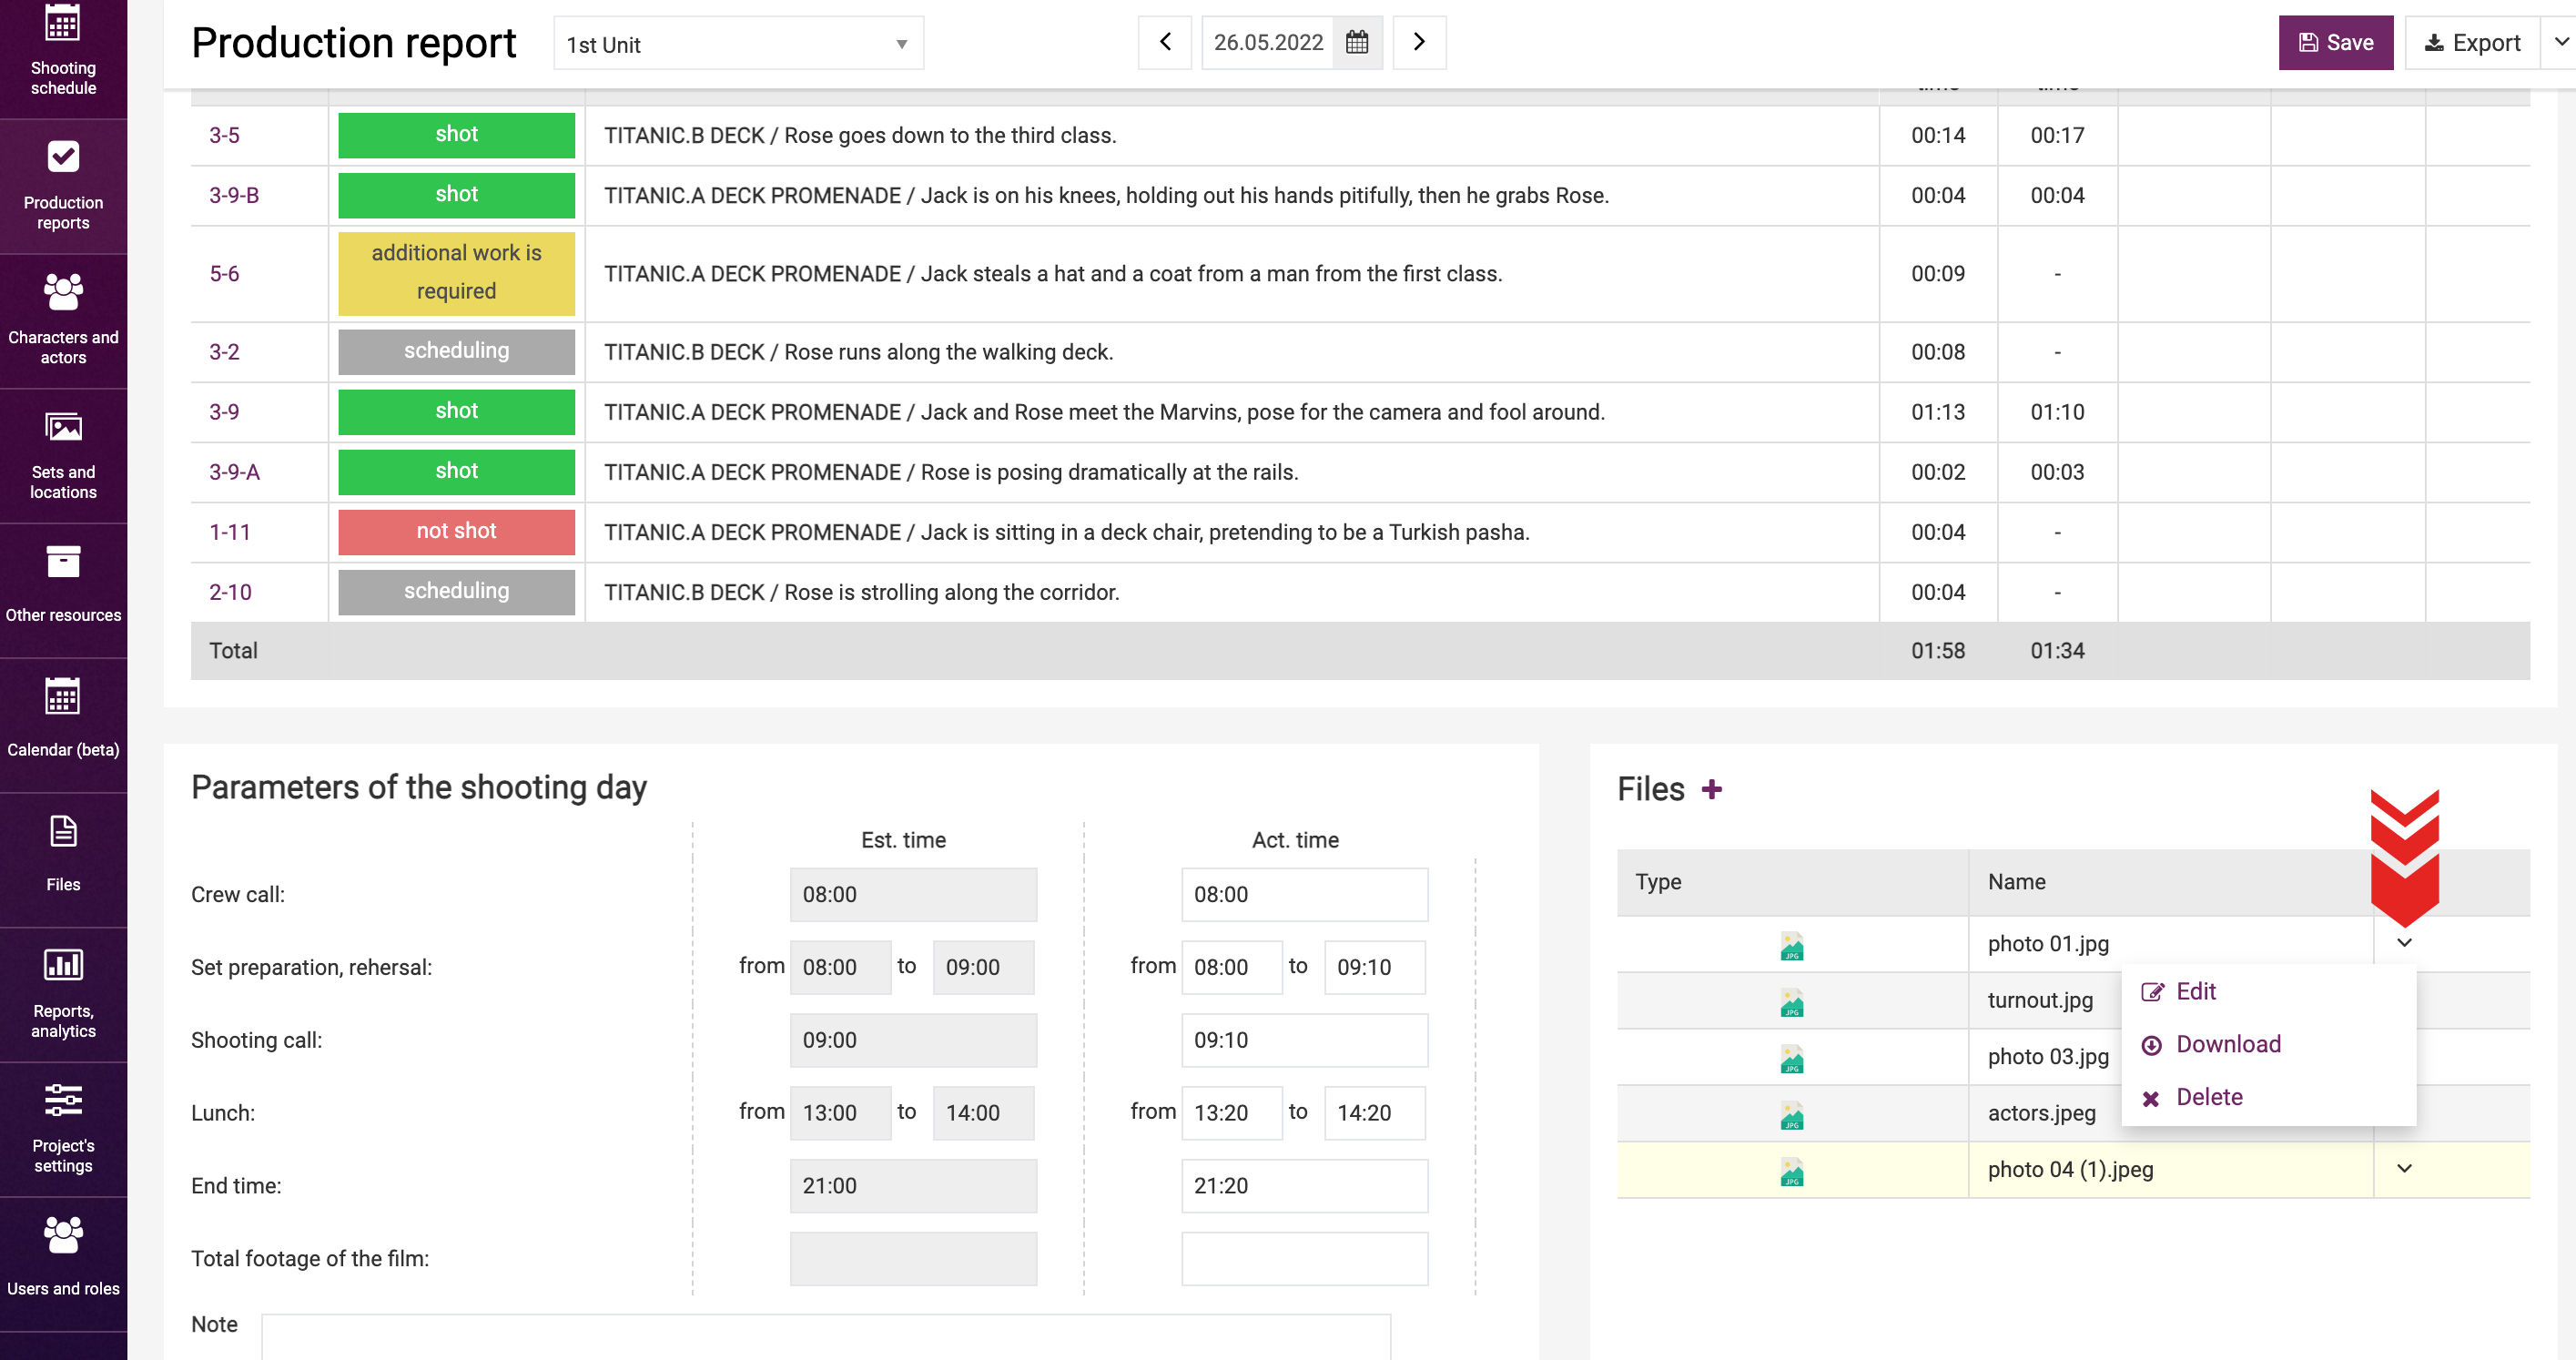
You can use the production report screen to add files. These may be the scans or photos of the shooting day reports/check lists, for instance, actor or department reports. As a rule, these reports are used to record a shoot in the production report.

To add a file to the report, click on “+” in the “Files” header.

The system will open a pop-up to add a file.
First, specify the storage to upload the new file to. Learn more about the management of storages in a dedicated learning modules.

Then select one or several files by clicking on “Select a file”, or drag the desired files with the mouse from a PC folder to the dashed area.

Otherwise, you can add a file by pasting a link thereto from Yandex.Disk, Google.Drive or Cloud.mail.ru.

You can add a note below, for instance, to specify what this file refers to, if its name does not explain the content.

In addition, be advised to assign proper categories to be able to filter the list of files by category in the future, for instance, by "Additional expenses”. You can either create a new category or select an existing one.

The “Attaching files to elements” module below specifies the production report that the file will be added to.

Click “Save”.
Each file you add has a drop-down menu in the right-hand part of the table at the end of the row. The menu has two items: “Edit”, "Download" and “Delete”.

If you select to edit, the same window will open as in case of adding, but it will display the file now. You can specify/change the category or leave a note there.
If you select to delete a file, it will be removed from the production report and moved to the trash. 
If you click on the file row, the view window will open. When viewing a file, you can use the arrows to scroll down the list of files. This window also has buttons at the bottom that you can use to download a file, jump to the editing window, and delete a file. 
You can view all files attached to production reports on the file list screen. You can access this screen using the “Files” tab in the left-hand project menu.
You can use the list of files to configure the view of specific columns and filter by desired category. Learn more about the management of the file list in a dedicated learning module.